- A camera (or phone camera)
- Compass (or compass app on device)
- Device
- Internet
- Drawing software (if you're isolating at home due to covid)
1
Investigating Potential Sites
The aim of this lesson is to select and record a site of your choice in detail. By the end of this lesson, you should have photographed your site from multiple perspectives, exported the images off of your device and laid them out in a digital portfolio for A3 print in colour.
You Need
Think About
Let's do something!
Choose a site worth developing
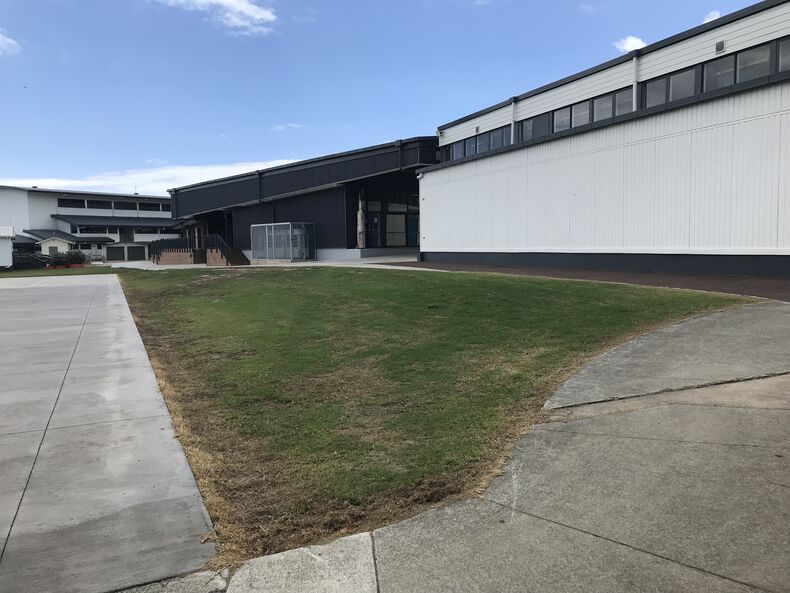
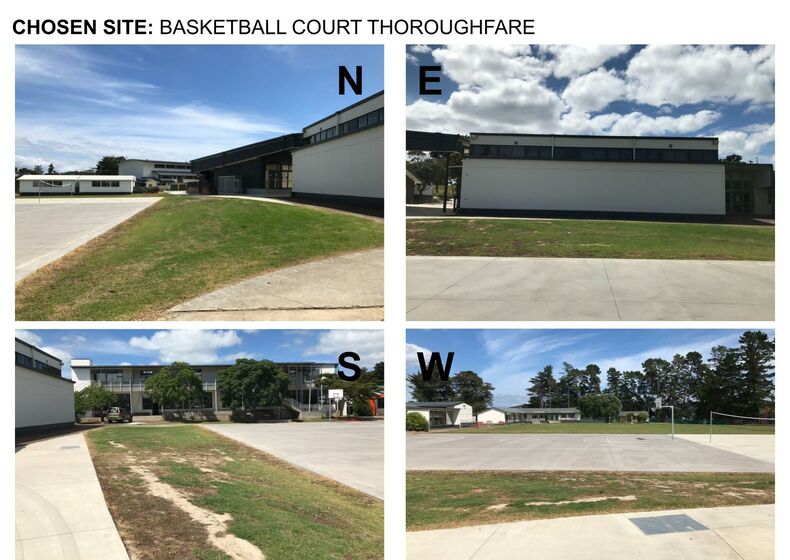
Chris’s chosen site
At your chosen site, take the following photographs:
a. Photograph your site facing the 4 main compass bearings (North, East, South, West) for reference to the sun and for 1-point perspective drawing (some devices have a compass app to help with this)
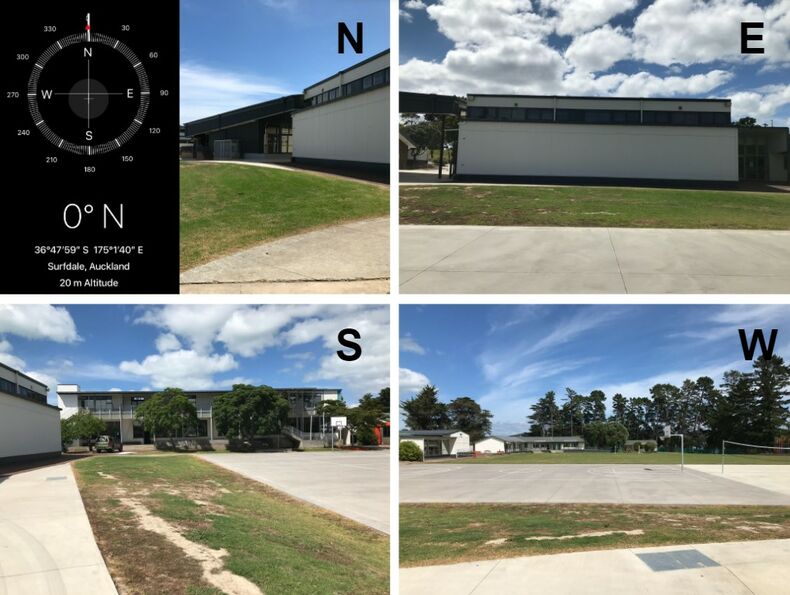
iPhones have a compass app which you can use at your chosen site to take your photos
b. Photograph your site at ‘natural’ angles (angles that give dimensionality to the site as if you are a person looking at it) for 2-point perspective drawings, allowing you to show the length and width of your site and your future design with people in it. We recommend including existing structures in your photos to help with scale when drawing over your images.
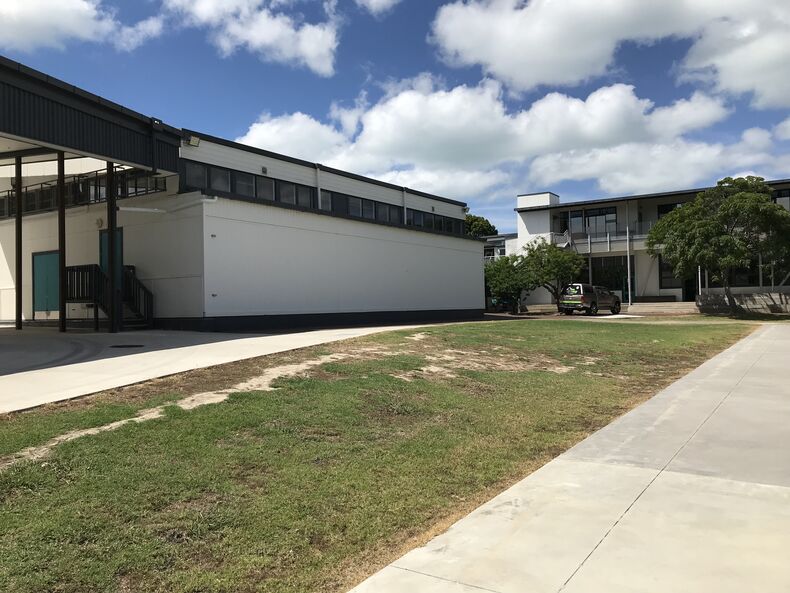
Try get the length and width of your site in your images, thinking about the placement of a horizon line for perspective drawing
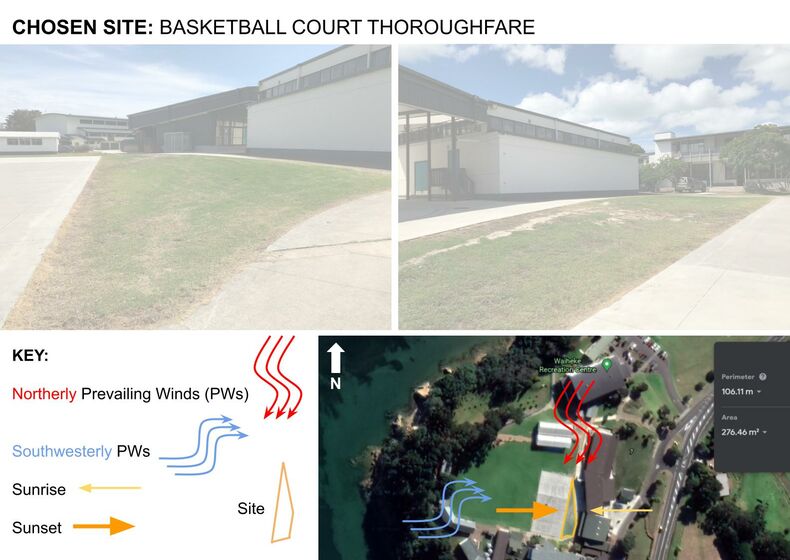
c. 2D Google Earth screenshots should be taken of your site. This includes a North facing 2D image in which you can map out the sun path, prevailing winds, and existing features on your site.
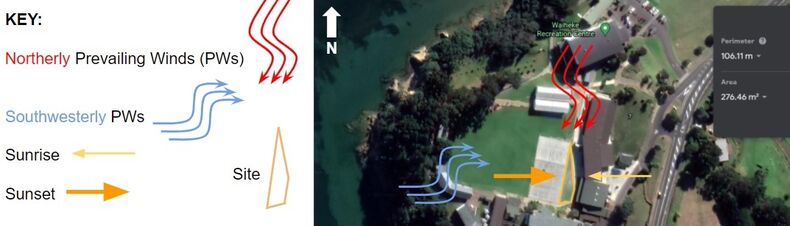
Chris’s example of sun path and prevailing winds layout (you may do this research later on in the process)
Export your images off your camera/phone (email them to yourself if using a phone), and then save them into a file called ‘Landscape Design Project<Site Selection,’ keeping them organised. Save your 2D Google Earth images here as well. Sort through your images to make sure you have at least 3 main angles for perspective drawing of your site, but more are welcome, and a 2D Google Earth plan view of your site.

Chris’s example of organising his images
Arrange these images into two A3 pages in your digital portfolio for this project (Google Slides is recommended). Avoid making the images small as you need to print these pages off in colour for drawing on.
Chris’s example of laying out images in his digital portfolio
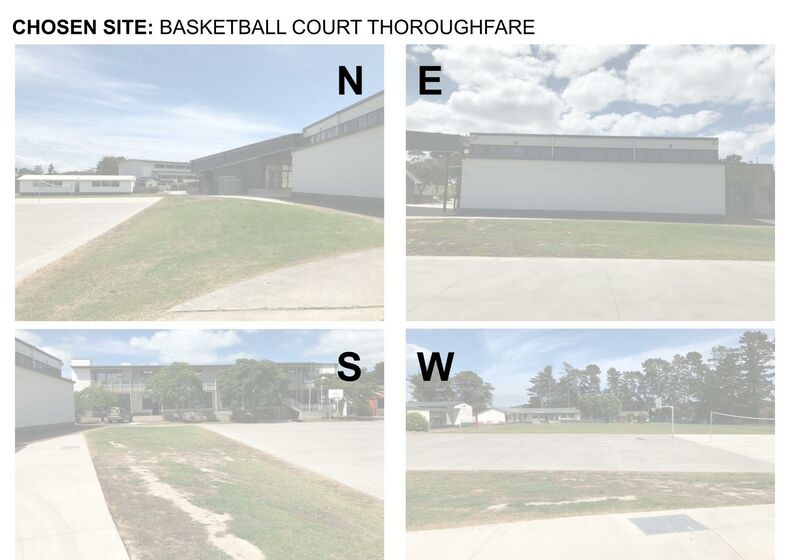
Once your images are arranged, you need to use basic editing software to either increase the brightness and reduce the contrast of your photos, or more simply, increase the transparency of your photos. This can be done using the format options and adjustments section on Google slides. We recommend increasing the transparency to 60% but this value may vary depending on the photos qualities. This will fade the image, allowing you to draw over it.
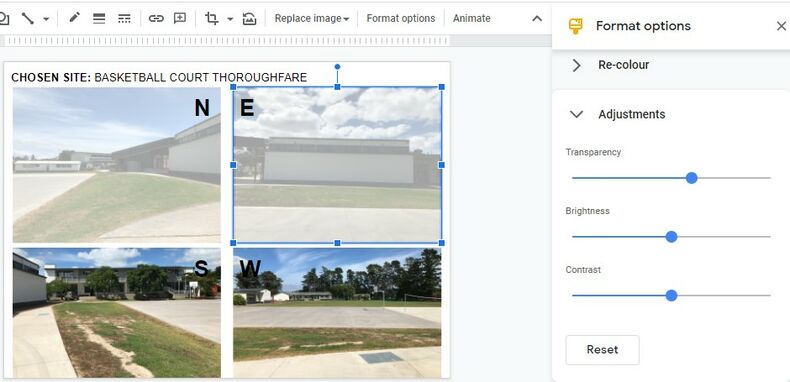
Chris’s example of how to dull down photos for drawing on
Chris's example of image layout
Chris’s site selection in digital portfolio (page 1)
Chris's example of image layout
Chris’s site selection in digital portfolio (page 2)
Extra for Experts: If you really want to understand your site, you may want to find the gradient of it to help inform decisions later on in the design process