Landscape Design Project

8 lessons

Introduction

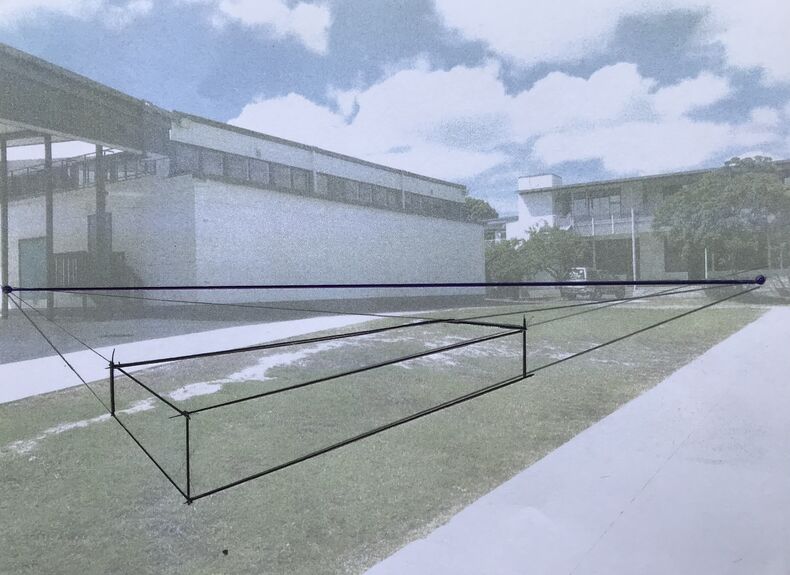
The aim of this lesson is to set up perspective drawings of your site from more than one angle. By the end of this lesson, you should have multiple angles ready to start thinking about design.

Lesson menu

Skip to slideshow

You Need

  • Printed A3 colour pages of your dulled site images
  • Pencil and pen
  • Eraser
  • Ruler
  • Device with internet and drawing software (if you're isolating at home due to covid)

Think About

  • Depending on the shape of your site and the angle of your images in relation to your site, you may draw in 1-point or 2-point perspective
  • If drawing in 1-point, you will be drawing directly down either the length or the width of your site and everything will point inwards to a single vanishing point (around the centre of the image) which the horizon line runs through
  • If drawing in 2-point, you will be drawing down the length and width of your site with lines that are parallel to two different angles (therefore going to 2 points along your horizon line)
  • Remember to use key landmarks (such as existing structures) in your images to help with scale when perspective drawing over an image

Let's do something!

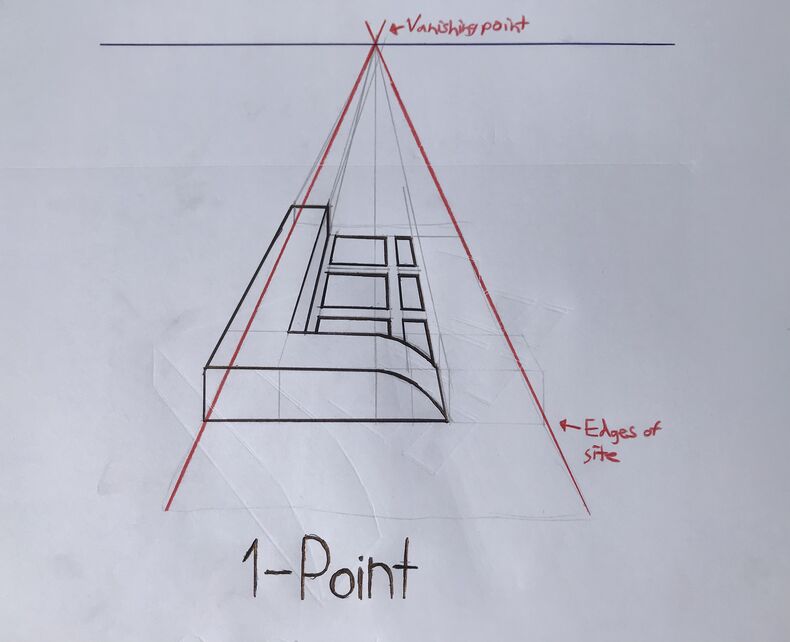
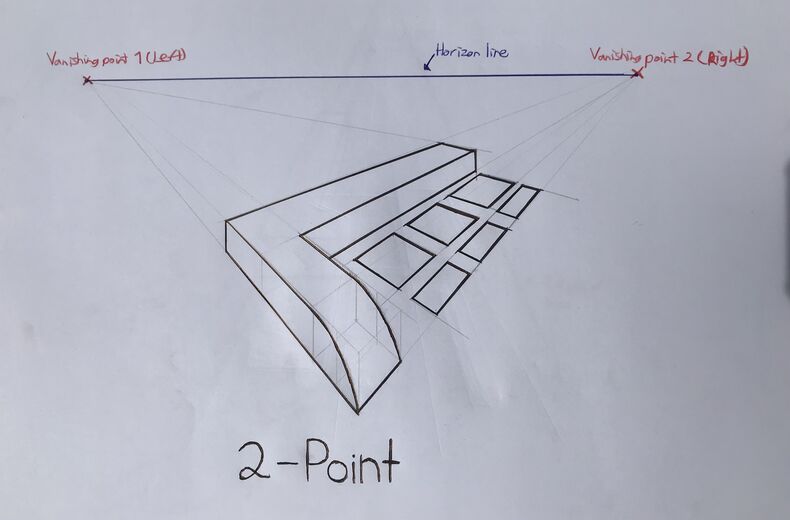
Watch the tutorial below on how to draw in 1 and 2-point perspective in a landscape design context.

Tips & tricks

  • Remember, the type of perspective you use (1-point or 2-point) will depend on both the angle that you take your images and the shape of your site
  • If your site is perfectly square or rectangular and you take a photo from either the length or width of your site, then 1-point perspective will be the most suitable for drawing on your site
  • If your site is a more organic shape that has a few curves, then you may want to take a photo from an angle to the site to capture the length and width, using 2-point perspective to draw your design

Start slideshow

Next lesson

4

Immersion - landscape design at it’s coolest