- Device
- Internet
- Notebook or digital portfolio for collating ergonomics research
- Paper
- Pencil/pen
- Ruler
- SketchUp
1
Investigating Potential Sites
The aim of this lesson is to take your 3D perspective drawings of your landscape design and turn them into 3D SketchUp models. By the end of this lesson, you should have developed a real-world proportionate SketchUp model, completing research into ergonomics to truly explore the functionality and aesthetics of your landscape design.
You Need
Think About
Lesson Content
At this point, you should have carried out the detailed analysis of a few different divergent designs of your landscape space, exploring what will and won’t work both functionally and aesthetically to meet your brief.
After completing good perspective drawings of your design/s, you may want to explore their opportunities in a digital format - CAD design.
You may be really keen to jump into 3D softwares such as SketchUp, or you may be a bit nervous due to the reality that you now need to show not only the aesthetics of your design, but the functionality of it using real-world measurements and ergonomics to fit a person into the space comfortably. Don’t worry though, we are here to help!

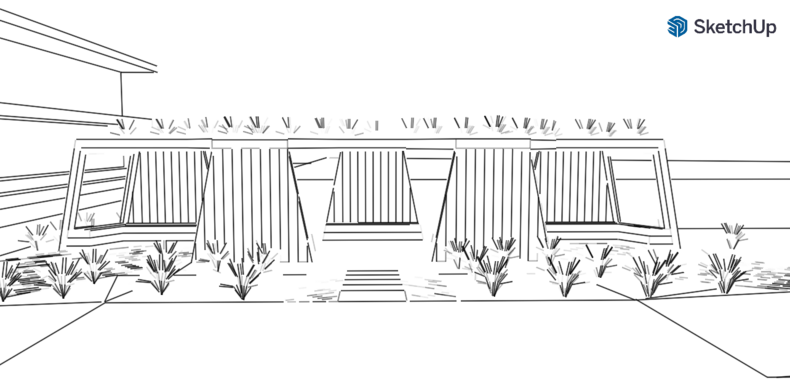
Chris's example of making his design in SketchUp
Let's do something!
It’s very crucial to construct 2D elevation drawings of your 3D design, making it easy to plan what dimensions you need to figure out. Elevation drawings include:
Show all the key features of your design in your elevations
From these elevations, you can not only plan out what plants will be situated where depending on site conditions and aesthetics, but you can write out measurements, based off of the existing dimensions of your site (using a regulating line), and using research into landscape design elements and principles for aesthetic mathematical design and ergonomics for functionality.
Ergonomic measurements to figure out include:
.
Resources on recommended dimensions are found below in the ‘SUPERSIZE ME’ section, but you may want to find some extra resources on your own.
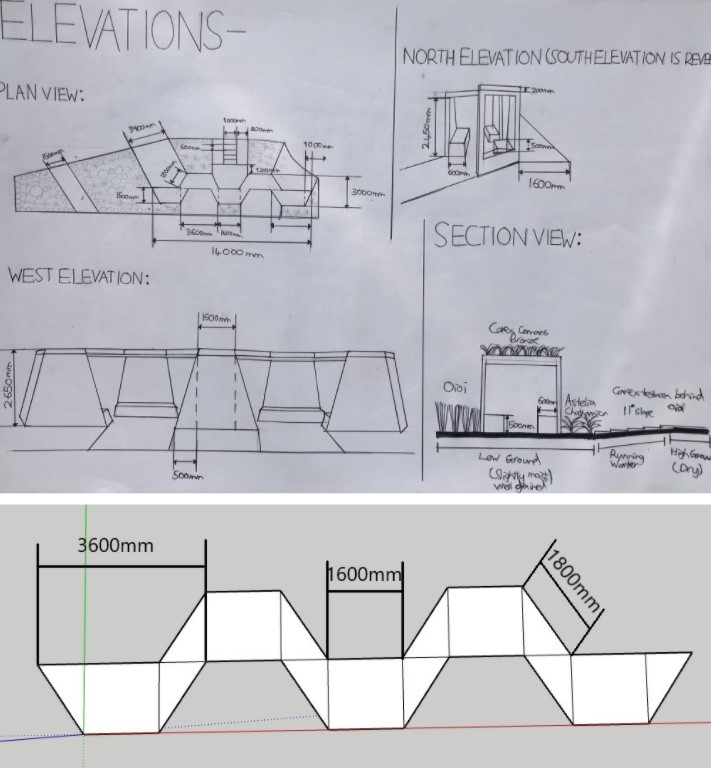
Chris's example of making elevations
If you are unfamiliar with SketchUp, we recommend watching the beginners tutorial videos below to increase your understanding of the tools. After this, have a play around on SketchUp to get a hang of how it works, before you get into building your design.
If you are already familiar with SketchUp, take your 3D drawings and 2D elevation drawings of your design, and start using them to construct your design in SketchUp.
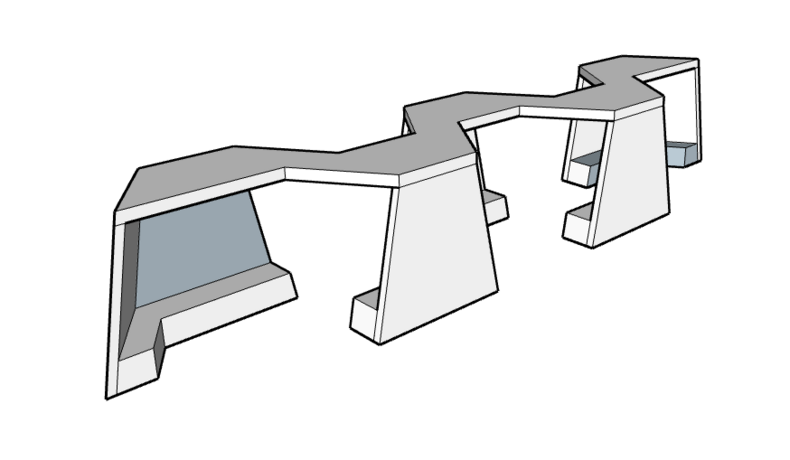
Chris's example of the early stages of making his design in SketchUp
.
.
Adding Real Backgrounds to SketchUp Images
To enhance the look of your SketchUp models, you should edit the images you take of them to include your chosen site in the background of the model, making them look extra real.
To do this, you can use any photo editing software that allows you to add layers of images which you can combine together, such as Photoshop. A free option for those using Apple devices is an app called ‘Photoleap’. Here is a quick step-by-step tutorial on how to add an image of your site to your SketchUp Images.
It’s best to use the measure tool on Google Earth to get a rough size of your site. You can replicate the shape and length of your site on SketchUp, it just may take a bit of fiddling around.
Chris's example of making his site shape in SketchUp
When you save images of your SketchUp model, click the option to save them as PNGs. This will mean that the image only physically consists of what you have built, and not the sky/ground around it.
Chris's example of saving an image as a PNG
This image needs to be taken in the same orientation that the image of your SketchUp model is taken (so they can seamlessly merge).

Chris's image of his site
Photoleap is a free photo editing software that can be found in the Apple Appstore. When on the app, press ‘Edit photo’ to add the first layer (the background), and then press ‘Import’ to add the second (your SketchUp model).
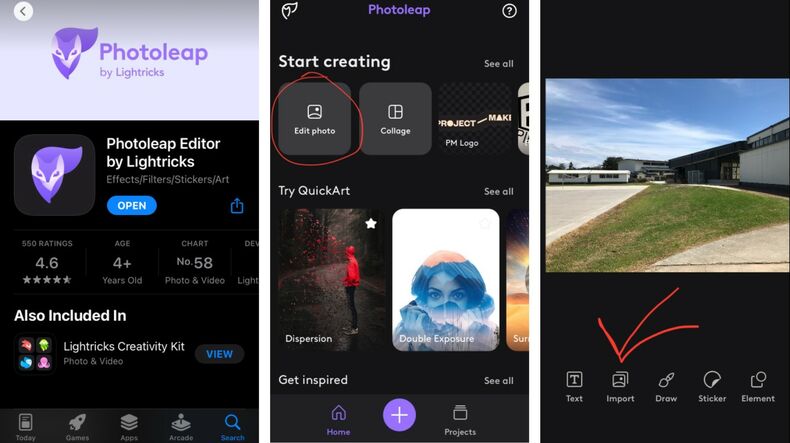
Photoleap app in the Apple Appstore
With the second layer in, adjust its size so that it aligns with the first layer (becomes to scale). Then, press ‘Cutout’ and ‘Erase’.
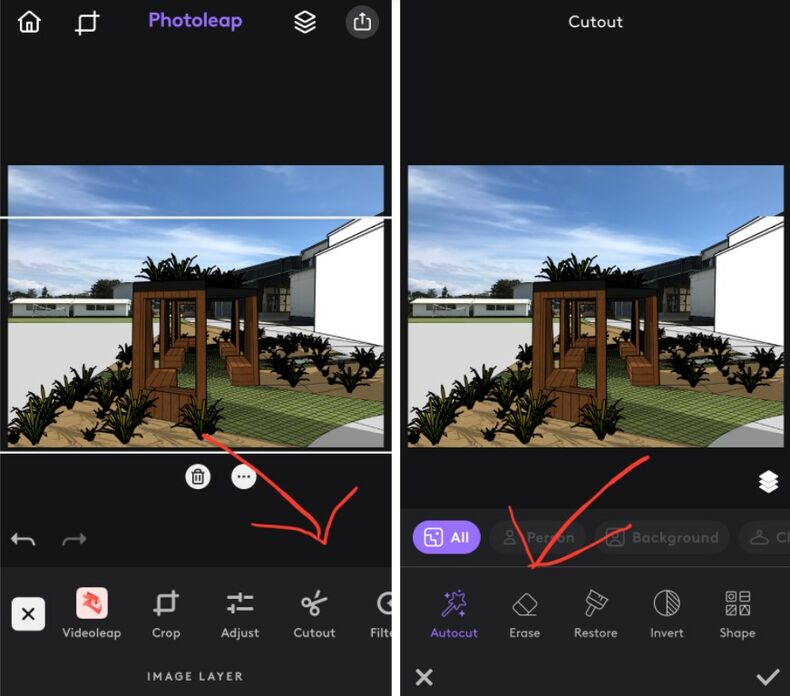
Press cutout and erase
In all the areas where you no longer want that part of the image because it interferes with the look of the model being on the site, simply zoom in and swipe back and forth to erase. Mistakes can be easily reversed by pressing the back arrow button at the bottom left corner of the screen. When done, press the tick to save your progress.
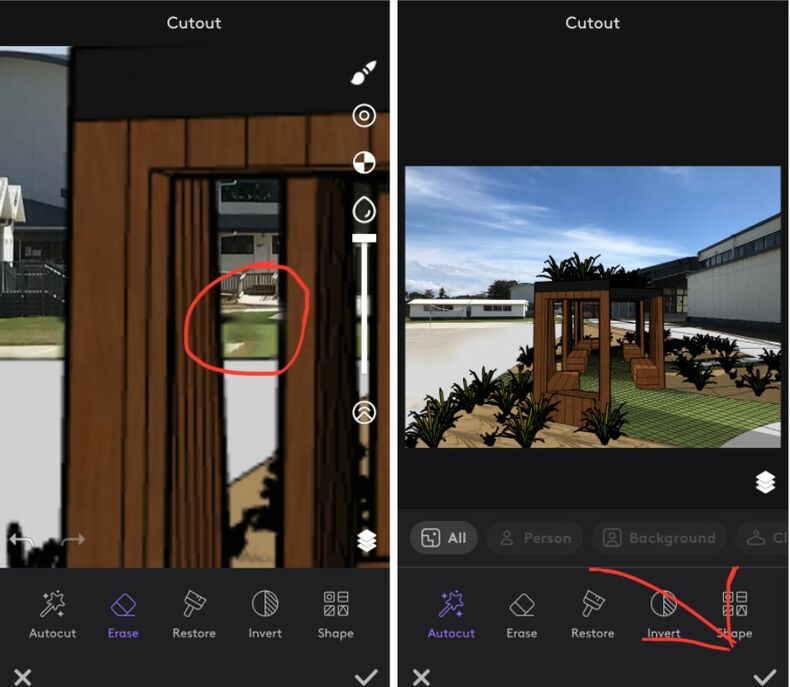
Erase the unwanted background
Now, press the ‘Layers’ button, appearing as paper stacked on top of each other at the top of the screen (now on the left side of the screen in the latest update), and then press ‘Merge’. Ensure that you are merging the second layer (the image of the model) to the first layer (the site image), otherwise the model image will be hidden under the site image.
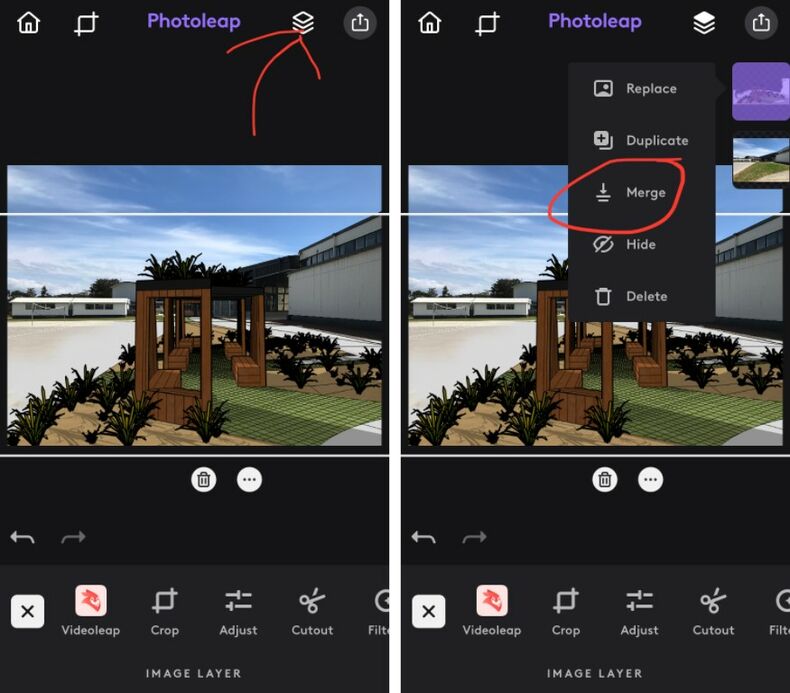
Merge the layers using the merge option
Now, press the export button at the top right of the screen, and save your final edited image as a JPEG, which is commonly the most preferred format for use in other places. You can also save it as a PNG if you want some part of the image to be transparent.
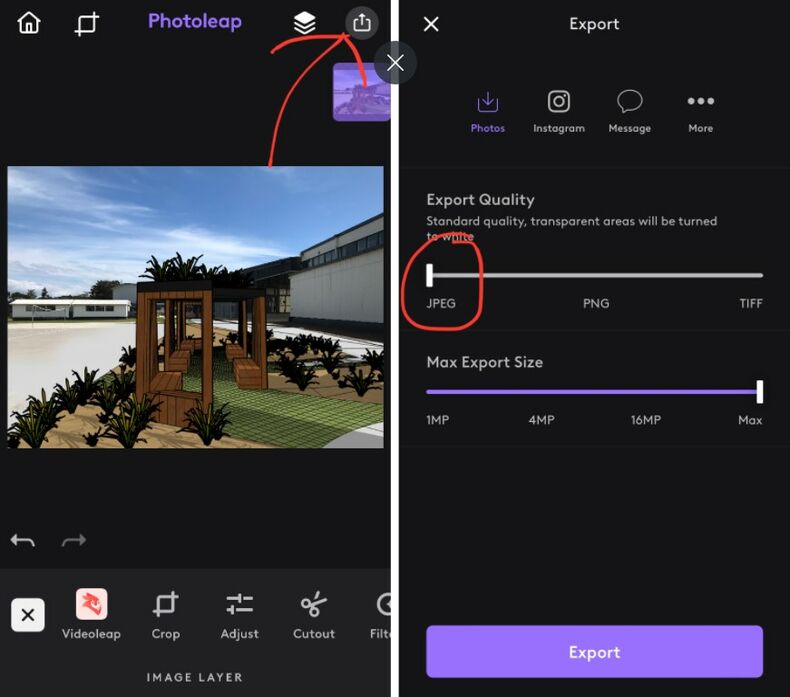
Export as a JPEG
Finally, email the finished image to yourself, and put it into your digital portfolio.
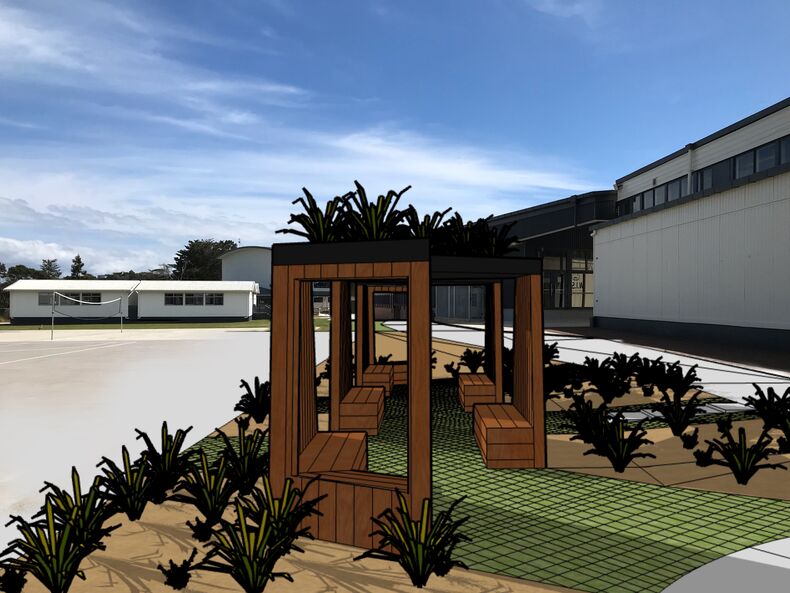
Chris's example of his final edited image
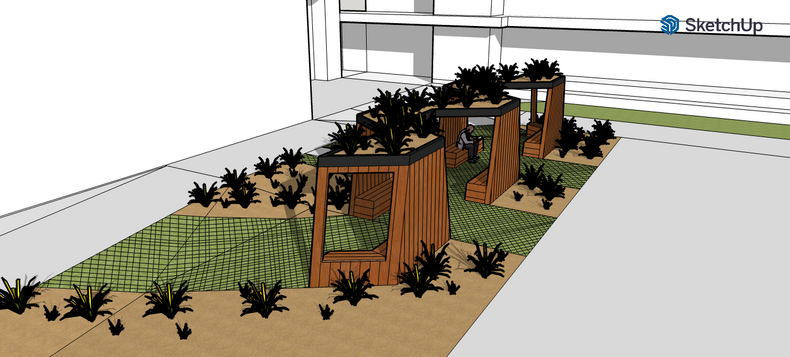
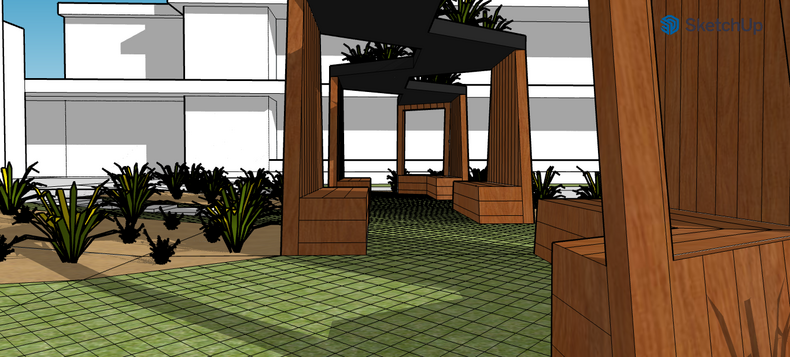
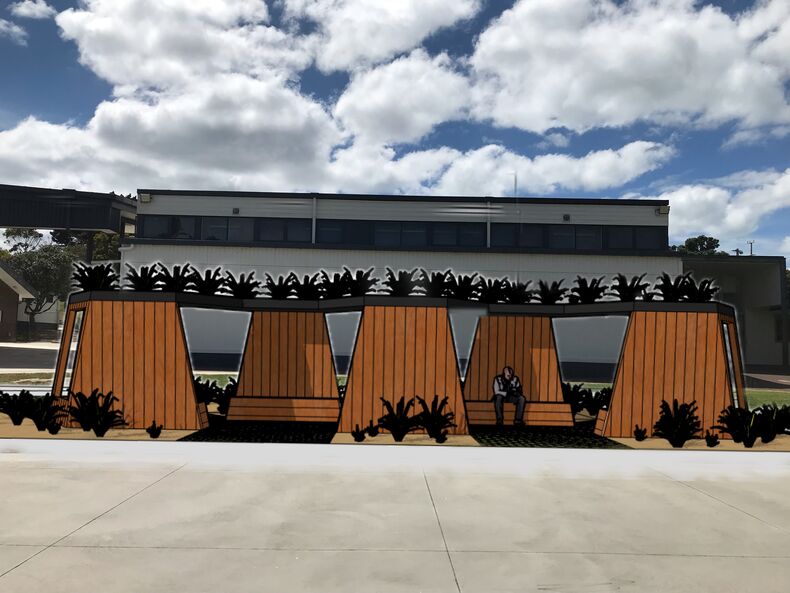
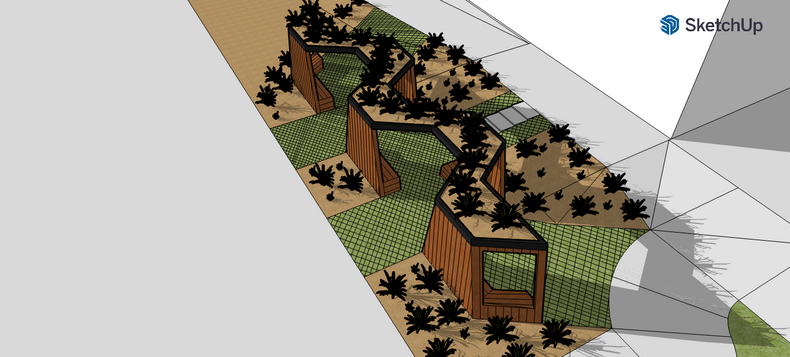
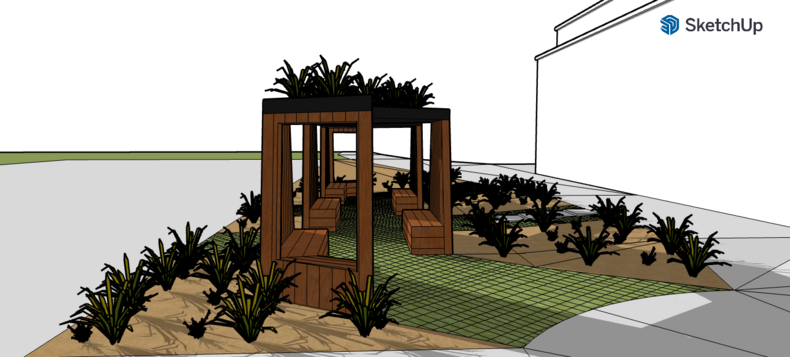
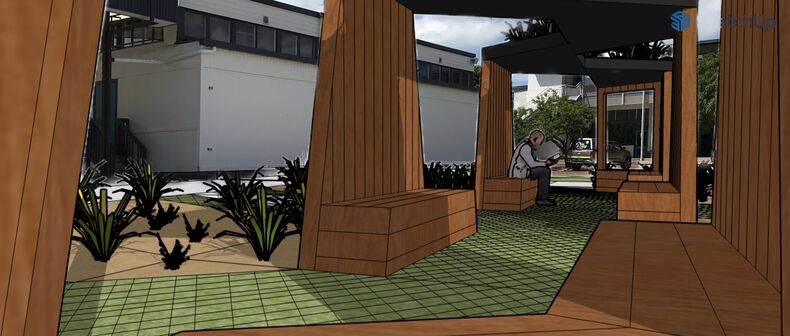
Chris's Finished SketchUp Model
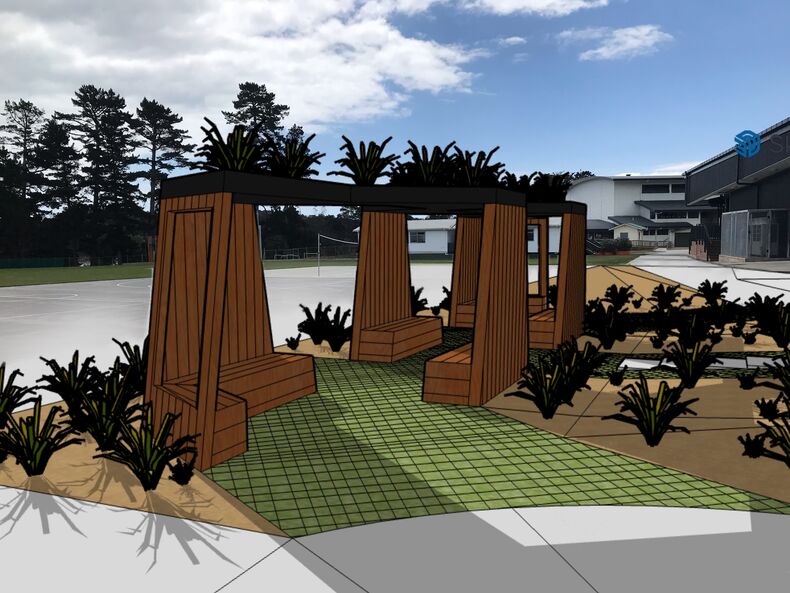
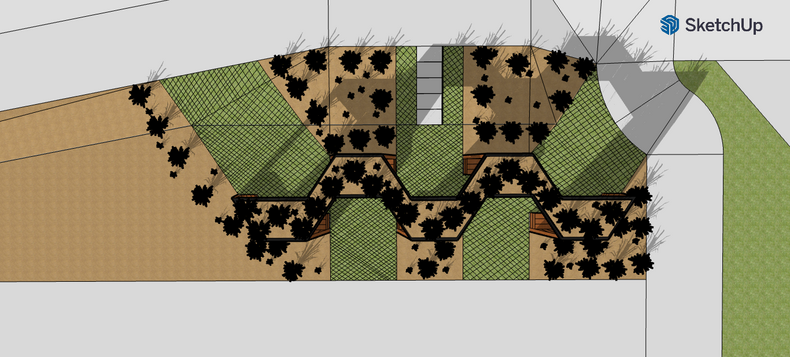
Chris's example of a SketchUp model

Chris's example of a SketchUp model

Chris's example of a SketchUp model
Chris's example of a SketchUp model

Chris's example of a SketchUp model

Chris's example of a SketchUp model

Chris's example of a SketchUp model
SUPERSIZE ME