- Laptop
- Printer
- Sticky notes
- Or notebook
1
Hunt and Gather
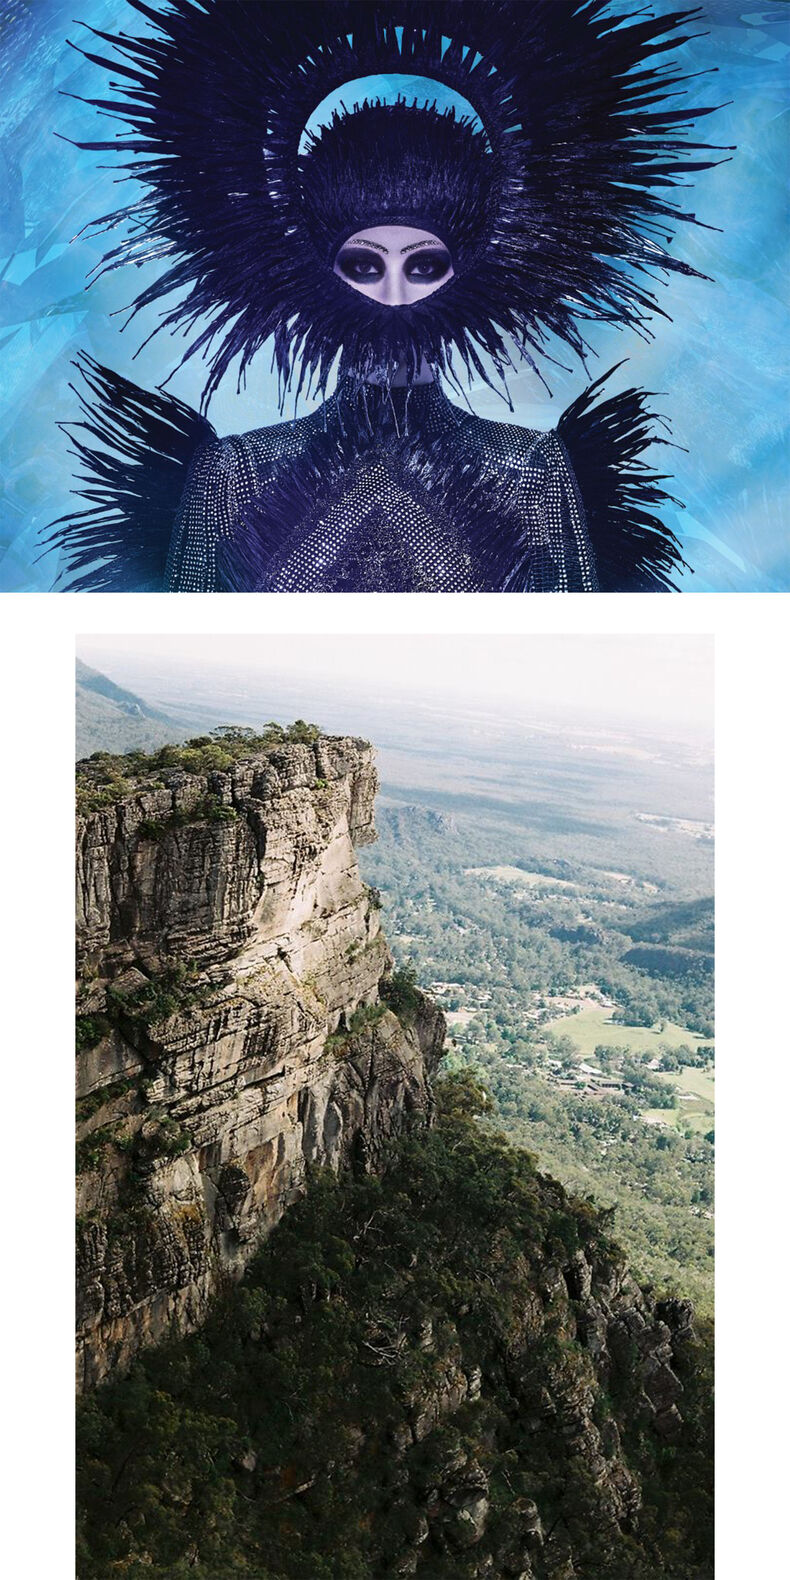
Wearable art pushes the boundaries of adornment and dressing the human form. From unconventional materials to hyper-conceptualism, wearable art holds a firm place in Aotearoa’s creative heritage. This project is an introduction to generating ideas surrounding experimental wearable art and expanding your own understanding of design and fashion terminology.
Equipment
Guiding questions
Think about these questions as you work your way through the lesson:
Lesson Content
Wearable Art is where the worlds of fashion and fine art collide. In its simplest form, wearable art is a type of art and artistic expression made for the human form. This could range from garments, jewelry, shoes, and headwear. Wearable Art can be extremely conceptual as well as very literal; it has the ability to get pretty crazy. This project is a place to channel that energy and design something completely out of the box.
Wearable Art is undoubtedly a part of New Zealand’s cultural heritage.
The ‘World of WearableArt’ award competition is an annual stage show held in Wellington. This involves both local New Zealand makers as well as international makers from diverse design backgrounds. The aim of the ‘World of WearableArt’ or WOW is to produce the unthinkable and challenge ordinary thinking surrounding art and fashion. Before you start on this project, check out the WOW website (linked below) and have a wee look at how some of the designers approach wearable art.
What better way to start a Wearable Art project than to get straight into the fun part, collecting some visual goodness! Wearable Art is so visually stimulating, which makes this first stage supercritical. The prompt for this project is ‘Landscapes’, the world around us will provide our inspiration for this project. Think about a landscape that means something to you, this could be a landscape you visit often or one you dream to travel to in the future. From your local park to the Grand Canyons, anything goes!
By the end of this lesson, you should have your landscape selected. Pinpointing a specific type of landscape to work with early on will help you to work with a specific set of visual elements.
What is your landscape prompt?
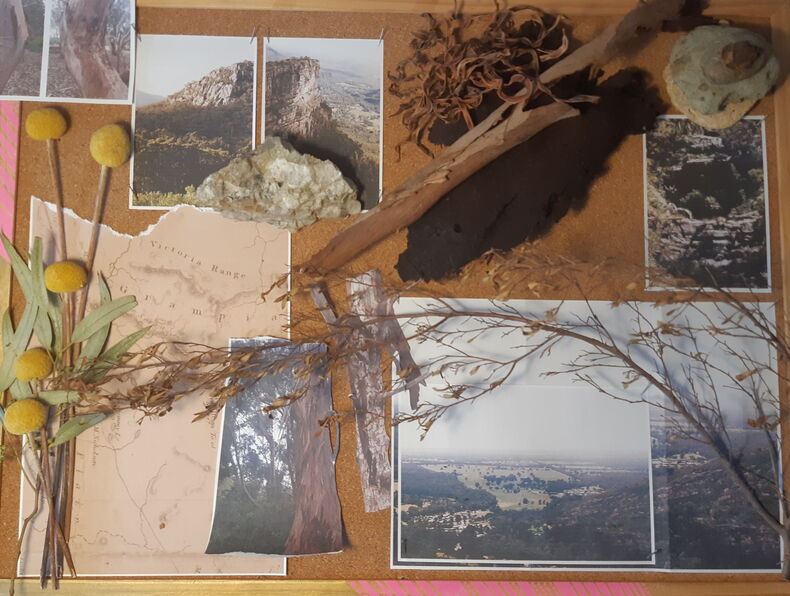
Cherie's Muse
One of our collaborators Cherie Vick, who prompted this project, chose the Grampians National Park in Australia as her focus landscape. She reflects on this landscape and explains why she chose it as her muse.
“I've done a lot of solo travel and some of my most connected and memorable moments occurred in the bush and on mountain tops. When I arrived in Melbourne to live, a friend arrived around the same time and we took a trip to Hall’s Gap and walked the Grampians. This was my first experience of the Australian landscape and I was struck by the colour palette and the wide-open plains either side of the Grampians. I decided to use some of my photography of that landscape along with flora from the nature reserve I live beside.”
Instructions
At this point let's keep it broad; research and gather imagery of a few types of landscapes that you are interested in or that have a relationship with.
Some ways you could do this are:
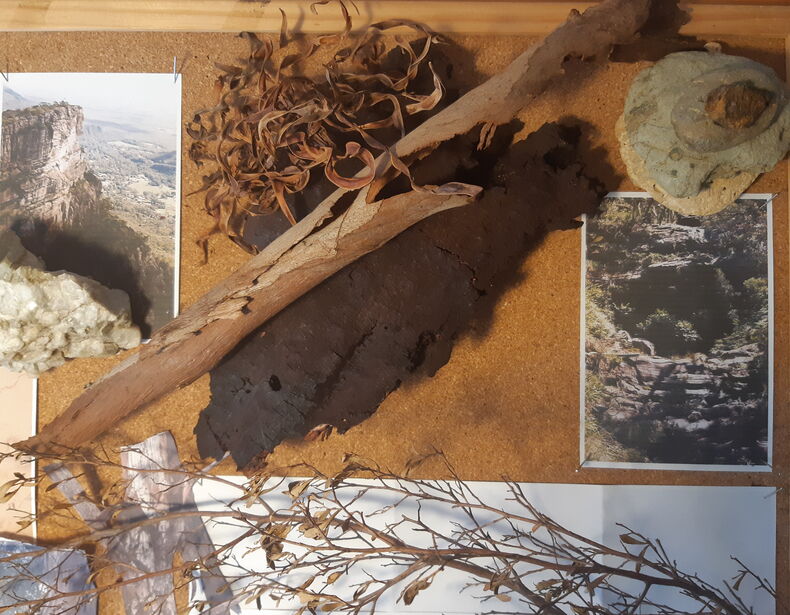
Example of resource material collection
You should now have a good amount of imagery under your belt. Start to organise what you have hunted and gathered into groups. Whether you print these out or arrange them in a document or PowerPoint, it is best that everything is visible so you can make connections between things.
These groups could be organised by:
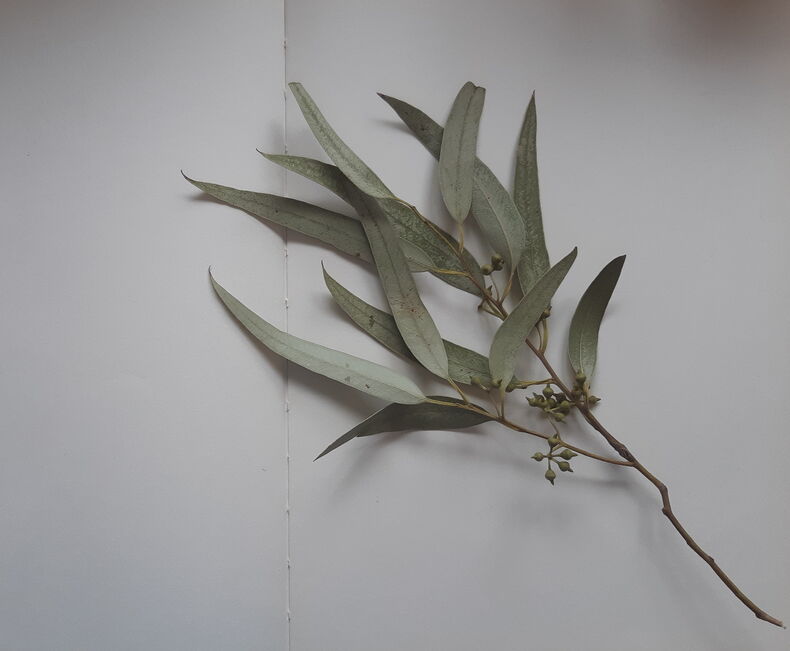
Leaf sample
Get the sticky notes out, it's time to look at what you've collected and organised with fresh eyes. Look at what you have and start to write down responses that stand out. Are your landscapes bringing forth a variety of descriptive words? What are the moods of your landscapes, are they quiet and sheltered or rigid and exposed? Try to pick apart what you've collected and ask yourself WHY was I attracted to this?
Once your workspace is looking like a detectives pinboard, you should have a type of landscape or something that generates the most responses and excitement. This is probably the idea you should roll with.
Describe what you see to unlock an idea
Video Resources