- Pen/pencil
- Notebook
- Scissors
- Gluestick
- Printer/photocopier
- Your source material and creative play
- Printed copy of the fashion figure templates
1
Hunt and Gather
Time to make a decision! Looking at your first lot of drawings, you should have a pretty strong idea of what you like and what you want to never look at again. So, we say pick 1 - 2 ideas/garments/drawings that you want to keep working with. Let’s get going.
Equipment
Guiding Questions
Think about these questions as you work your way through the lesson:
Lesson Content
Committing to an idea can be difficult, but it is crucial to the development of your design process.
Try to not get too caught up in picking your drawing/idea to develop. We say, go with your gut - but if your gut doesn't know either, then ask a friend, teacher, mentor, or family member.
Once you have decided which of your 1 - 2 ideas you want to take further, you can set out on making and developing. Keep in mind the Design Elements and Principles you have used in your chosen design and extend these ideas further.
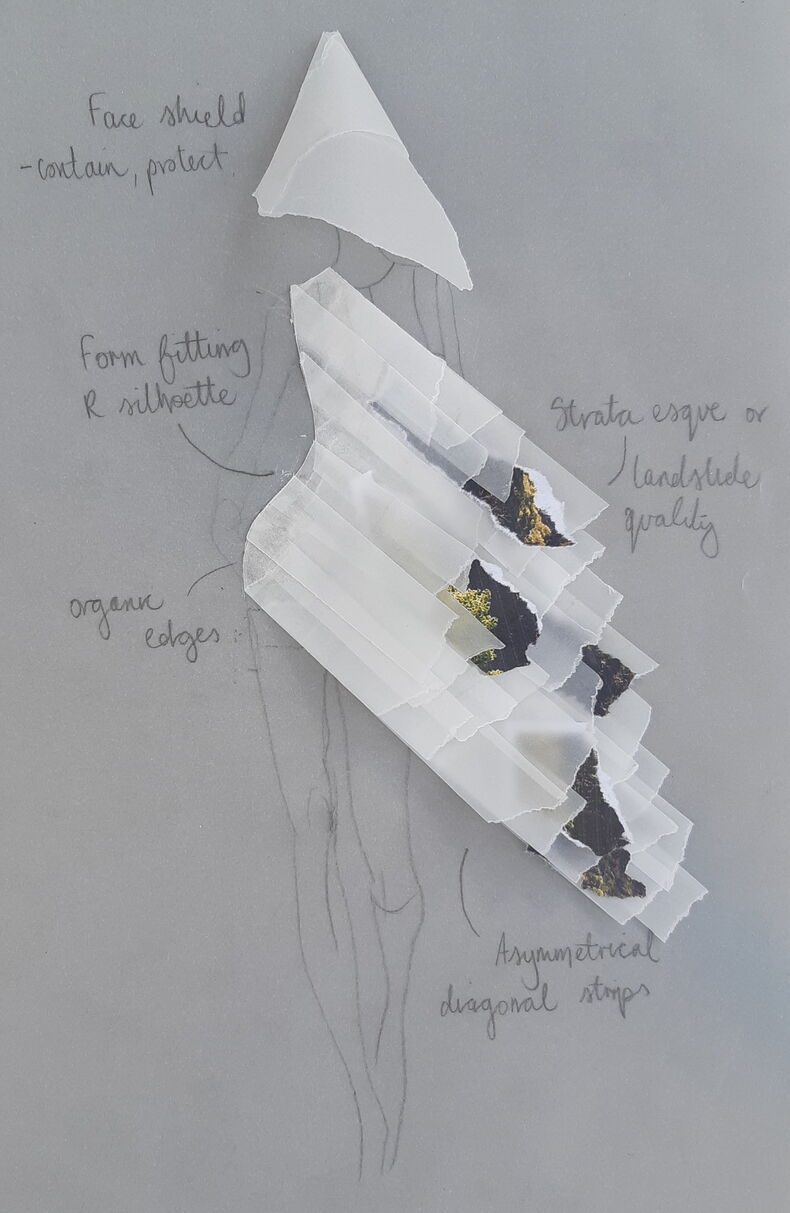
Example of exploring a landscape prompt and turning it into wearable art
Instructions
Decide which of your ideas is your fav. Don’t overthink it - the first choice is probably the best.
Figure out what design elements and principles your garment contains. Try pinpoint how these relate to your chosen landscape.
What does your idea look like? How will it move? Who do you envision wearing it? What is important to your design?
Is it:
Using the fashion figure templates provided (or your own), draw at least SIX more iterations based on your chosen idea. The purpose here is to develop your original idea even further, testing slightly different variations, and tweaking details is fine. These SIX iterations do not need to be dynamically different, this process is more focused on fine-tuning and starting to finalise.
Make sure you think about how your garment looks from the front, back, and side views. Will it make a statement from far away or is the genius all in the detail?
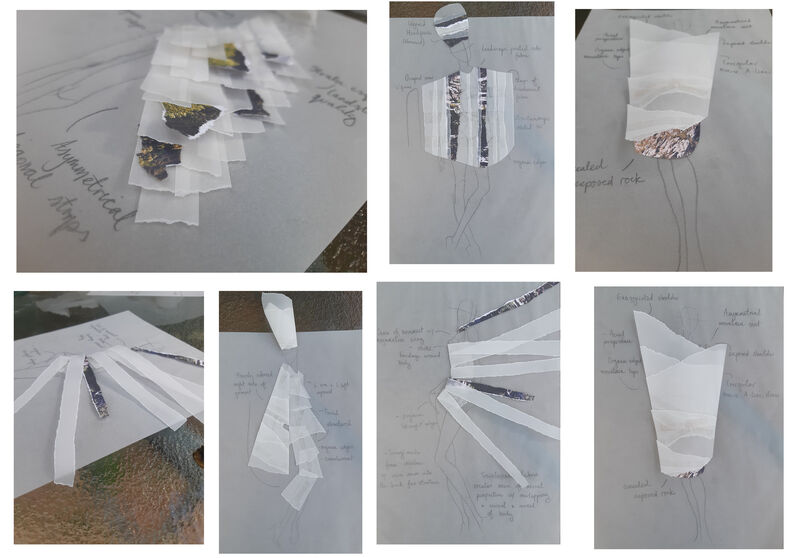
Generate at least six more ideas and photograph them
Resources