- Pen/pencil
- Notebook
- Scissors
- Gluestick
- Printer/photocopier
- Your source material and creative play
- A printed copy of the fashion figure templates
1
Hunt and Gather
In this lesson, you will use your knowledge and materials from previous lessons to start drawing garments. At this point, ‘drawing’ refers to assemblage and collage just as much as sketching pen to paper. Start to think about how elements of your source material and creative play could mimic the form of a wearable garment.
Equipment
Guiding Questions
Think about these questions as you work your way through the lesson:
Lesson Content
Now you have a better understanding of the Design Elements and Principles, it's time to bring together what you have collected/made in lessons 1 - 2 with what you have learnt so far. The whole point of wearable art is that it kind of has to be wearable right? So, in this lesson, you will be drawing onto human figures, also known as croquis.
Referencing your inspiration, you will begin morphing and molding your imagery, source materials, and ideas into a piece of wearable art.
Making wearable art for the human form comes with its obvious restrictions (weight of the garment, using safe materials, etc). However, at this point, the general rule is: if a body can get into it, the world is your oyster.
At this stage try not to get too caught up in the technicalities of things having to be practical and wearable. Forget zippers and armholes, for now, try to focus your energy on the aesthetics and representing your landscape well.
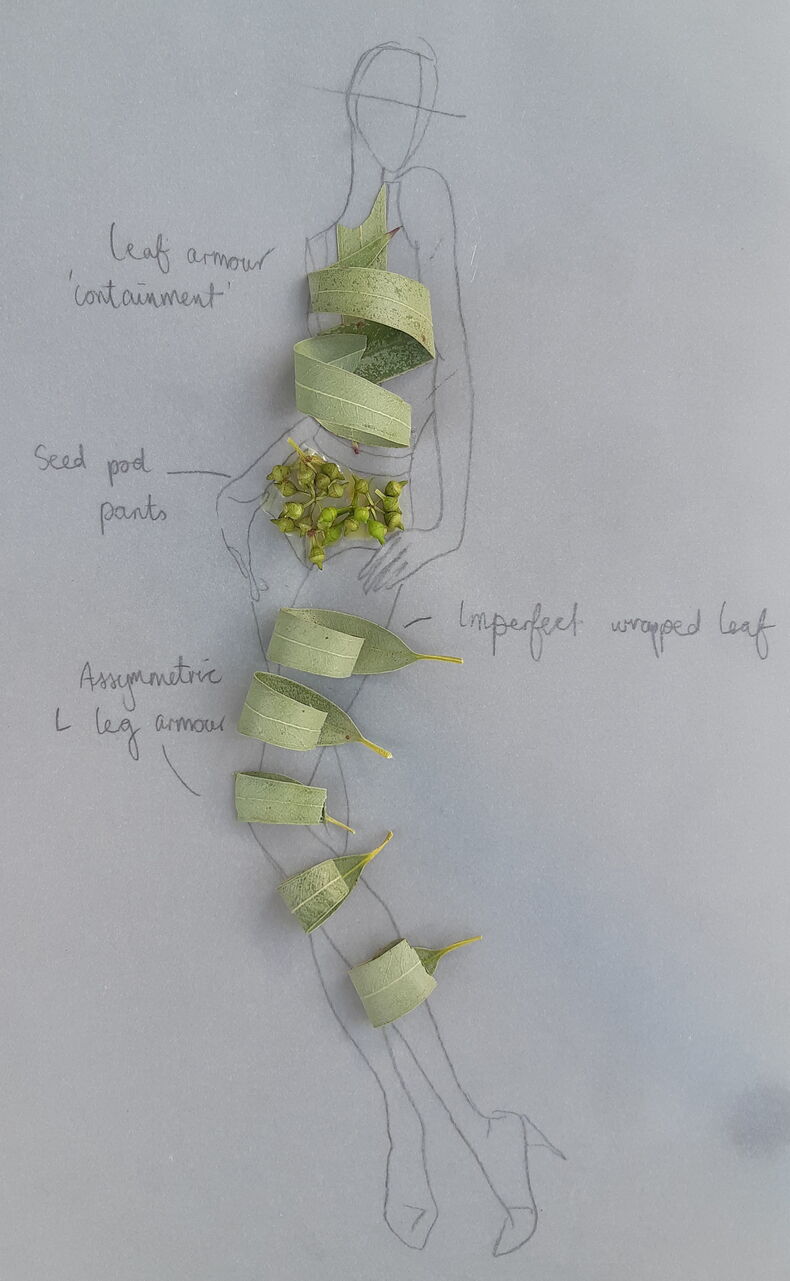
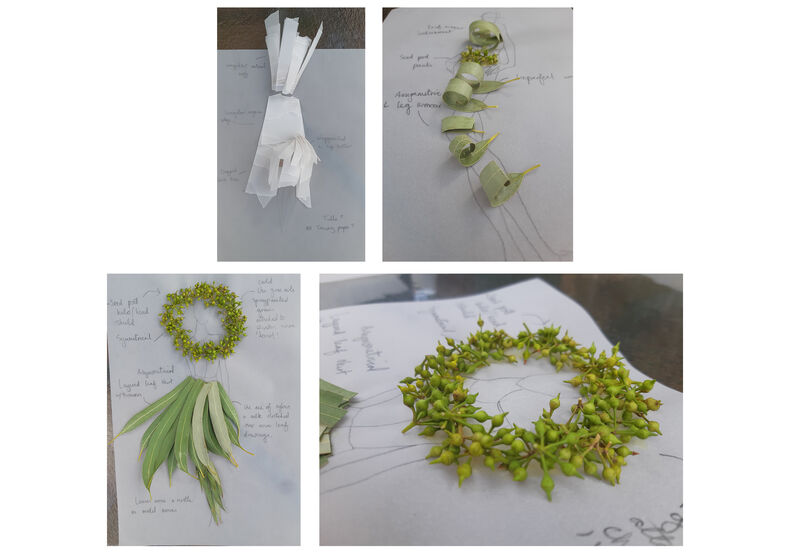
Example of exploring a landscape prompt and turning it into wearable art
Instructions
First off, we need some fashion figure templates, in fashion terminology known as croquis (you can find our examples to use in the resources section below). These are basic outlines of human forms that you will ‘draw’ your wearable art on top of.
You will need to print these out so you can work on them physically. If you are making a garment for someone/something specific, you can draw your own template or use one you find online.
Gather your source material and creative play in front of you. If you are reluctant to cut these up, then photocopy them before you start.
Just like when you bake a cake, it’s a smart idea to lay your ingredients out first. Mostly so you know what you are working with, as well as to make sure you have all the ‘ingredients’ you need.
Now finally, time to ‘draw’. There is no particular method to this madness, but we do suggest starting off by sketching basic shapes or lines you like onto your figure. These lines from your landscape might mirror a neckline or a length of a leg.
Once you feel a bit more loosely goosey, you could start to cut, tear or fold (or any other method you can think of) your source materials and things from your creative play.
Place and stick them onto your figure. Using these shapes and forms you have already gathered and made, the aim is to build a garment. Remember to keep your landscape in mind while you do this, referring back to things such as line, colour, and shape.
Try to do this process so you have at least SIX different garments on figures. This might seem a lot but this is your opportunity to get all your ideas out and onto paper.
Note: view the examples of this process below.

Start exploring and creating
Take photos of all your ideas at this point
Resources