- Workbook/digital portfolio
- Pen/pencil
- Laptop/computer
- Cardboard to construct your model/scissors and masking tape
- Camera to photograph models
- CAD software (Sketch Up is a good place to start)
1
Unpacking the Brief
1
Unpacking the Brief
2
Design Properties
3
Exisiting Product Evaluation
4
Hunt and Gather
5
Ideation
6
User + Object Considerations
7
Environmental Considerations
8
Developed Ideas
9
Functional Modelling
10
Construction Research & Testing
11
Working Drawings
12
Technical Drawings
13
Production Flowchart
14
Final Evaluation
Now it gets a little crafty! It's time to make some models using both cardboard and in CAD software. This process is really helpful to begin to see your ideas (and all your potential problems) in 3D. It's important to remember to use scale during this process. That means, deciding on your measurements and making models that are small versions of your ideas. This will also help you nut out issues with proportion.
Equipment
Guiding questions
Think about these questions as you work your way through the lesson:
Lesson content
A functional model is something a designer does to help them figure out, wait for it, functional problems. Yeah, clue is in the name. The word model refers to a representation of an object. A functional model can be a physical representation (cardboard, foam, 3D printed sculpture, etc.) or a digital representation (3D model, render, and arguably a technical drawing).
A scale model is a model, either physical or digital, is where the measurements/size of the object is accurate but has been (usually) reduced to a specified scale. In Product Design and Architectural Design, specific scales are used depending on context. Basically; different scales for different fields and different scales for different models.
The purpose of these models is to figure out what our ideas look like in 3D space and to note any issues the ideas present around construction, form, and function.
Instructions - card model
Referring to your final drawing of the last lesson, compile the feedback you got. Then modify this final drawing based on the feedback you received and any new ideas you want to include. In short, get your ideas ready to GO!

Hollie's refined ideas after feedback
Make a 1:xx (decide with your teacher the appropriate size) scale model of your top two design ideas using card
Take photographs of your scale model from different views/angles and upload to your portfolio if working digitally. It's good practice to photograph your models - mostly because they are easily damaged, but it's also helpful to have a record of your design ideas for future

Hollie's 1st idea
Get stakeholder feedback again and make notes where necessary

Hollie's thoughts after feedback
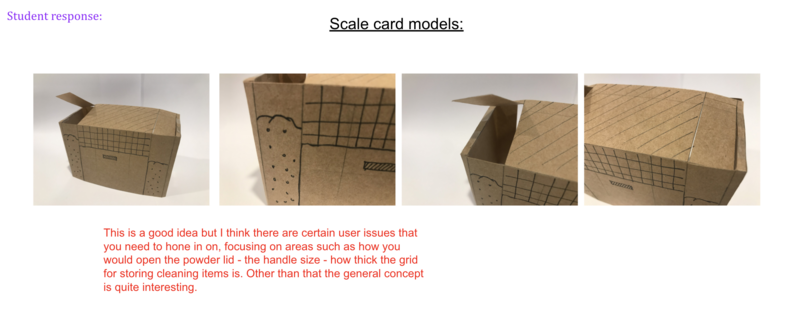
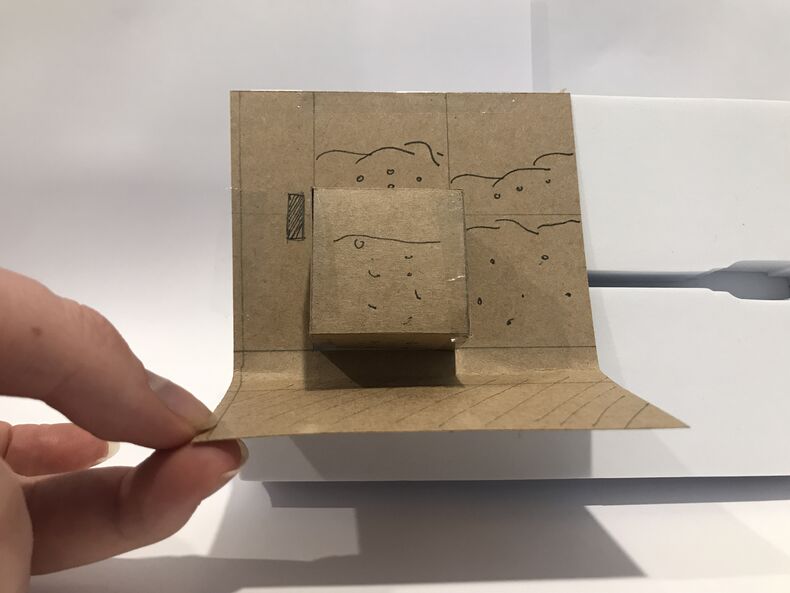
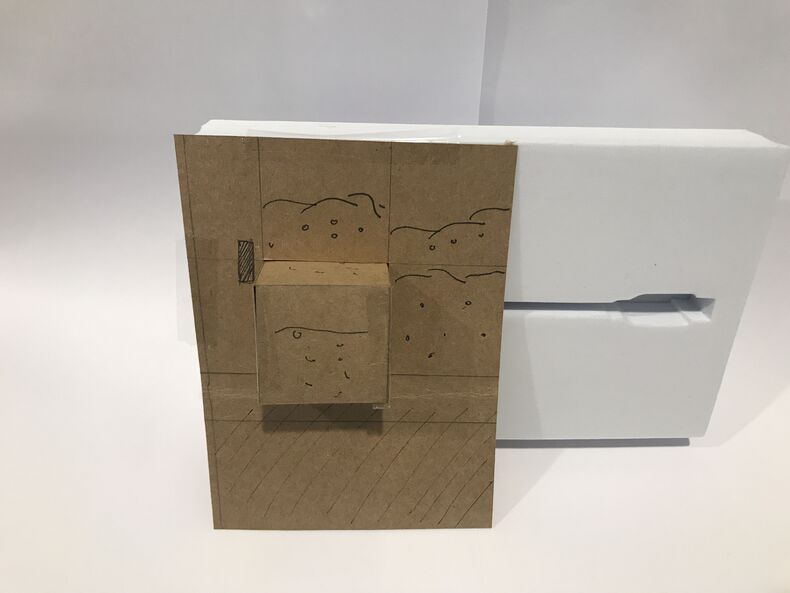
Hollie's card models

Idea 01

Idea 02
Instructions - CAD model
From here it's much the same except using CAD to do your modelling.
Hollie's examples

Idea 01 in CAD with evaluation

Idea 02 in CAD with evaluation