- Notebook/digital portfolio
- Pen
- Laptop/computer
- Camera
1
Unpacking the Brief
1
Unpacking the Brief
2
Design Properties
3
Exisiting Product Evaluation
4
Hunt and Gather
5
Ideation
6
User + Object Considerations
7
Environmental Considerations
8
Developed Ideas
9
Functional Modelling
10
Construction Research & Testing
11
Working Drawings
12
Technical Drawings
13
Production Flowchart
14
Final Evaluation
In this lesson we need to think specifically about the environment that your storage solution is being designed for. It's important to learn as much as possible about your intended location as it will impact, limit, and inform your decisions.
Equipment
Guiding questions
Think about these questions as you work your way through the lesson:
Lesson content
When designing and making your bespoke storage, it is important that you are working within realistic parameters. From size to materials, your design needs to be well considered and possible for you to make in the environment you are in. This includes factors such as tools, time restrictions, and your own experience levels.
Instructions - Part 1
Think of all the possible places your storage solution COULD go within your selected space and note these down in a brainstorm in your workbook. Look closely at your classroom, have you thought about the spaces under benches and tables? Inside existing cupboard spaces? All of the available wall spaces?
Make a detailed description of the conditions of these spaces in your brainstorm
Write about what performance properties your storage needs to have to be suitable in/for each environment
Choose what you think is the BEST space for your bespoke storage - and explain your choice. This should be backed up with what your key stakeholder has said
Get stakeholder feedback in RED, discuss your feedback, and consider why people have said that
Note: Hollie's example is found below.
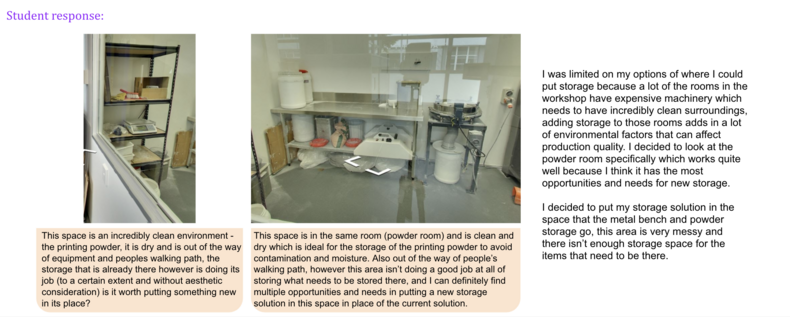
Hollie's example

Note: Hollie's choices have been limited by restrictions. How limited are you?
Instructions - Part 2
Brainstorm all the considerations of the school environment and the workshops, thinking about:
Note: Hollie's example is found below.
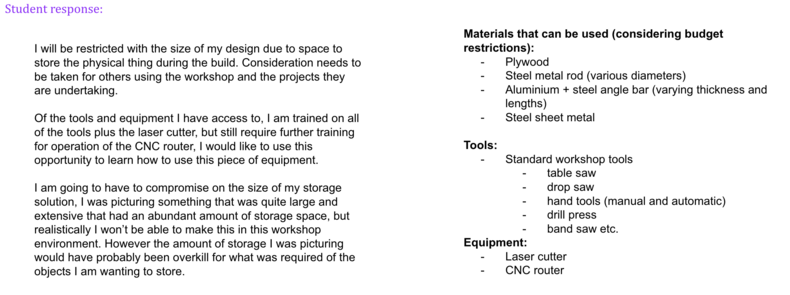
Hollie's example

Hollie's response to restrictions
Instructions - Part 3
In your workbook, make a list of all the projects you have made at school. This can cover multiple relevant subjects or classes
Add the tools (e.g. scribe) and processes/techniques (e.g. spot weld) used to make each project
Add the materials you used (e.g. aluminium rod) and the performance properties (flexible, low melting point, lightweight)
Highlight any materials/tools/techniques that will be helpful or that you might use for this project
Note: Hollie's example is found below.
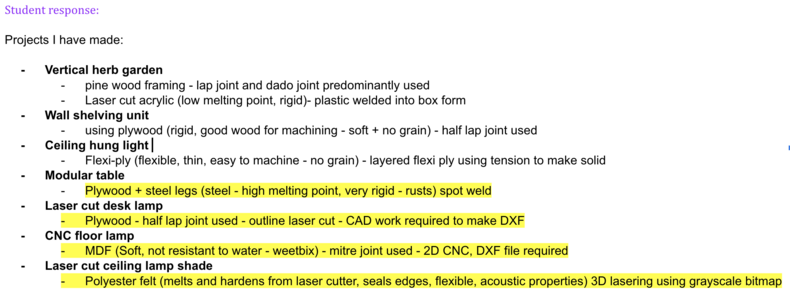
Hollie's example

Really take the time to think about all of the things you have made and how you can use that knowledge