- Device
- Internet
- Camera
- Copy of the quick reference sheets
- Software to collate personal reference sheets (InDesign or Google Slides)
1
Introduction
The elements and principles of design are the building blocks of everything visual. It’s important to have a basic understanding of what they are and what they are for, before we begin to analyse and ‘unpack’ the works of other makers.
Equipment
Guiding Questions
Think about these questions as you work your way through the lesson:
Lesson Content
Everything that we can see can be described using the elements and principles of design or ‘DE + P’.
On one hand it’s important to understand WHAT the elements and principles are so you can DESCRIBE something that is visual (translating something visual into words is a skill in itself). On the other hand - understanding the DE + P helps us analyse and judge the QUALITY of designed outcomes. Ultimately you have to know what they are if you’re going to actually use them, let alone use them to extend your ideas.
So what are they?
Elements: aspect of something; ‘colour’ - the cat has black and white stripes
Principles: how the elements relate to each other - the coloured stripes make a repeated pattern
In fields of design there are rules and practices around how to use the DE + P. Understanding what they are and how to apply them is important because it means you are in control of the affect your design will have. It’s also important to know the rules so you can decide to intelligently break them.
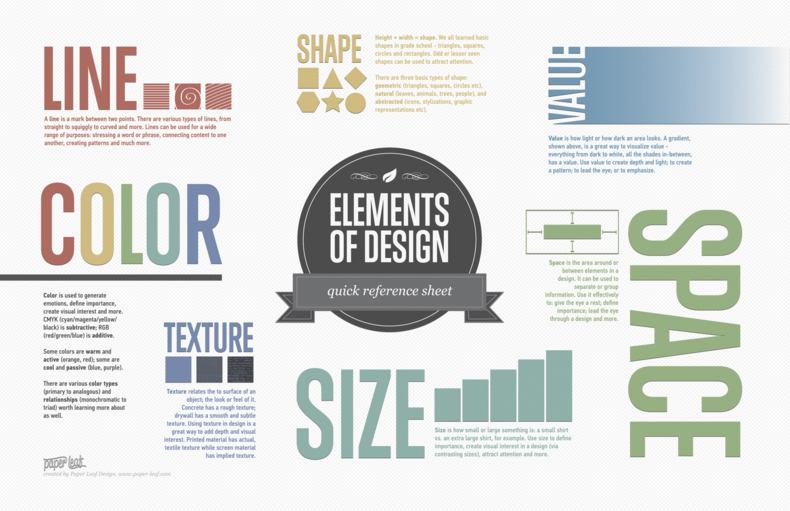
Paper Leaf's reference sheet
Most people notice when something is ‘badly’ designed. We’ve all seen a ‘bad’ website or poster. Often things that are well designed are taken for granted; you just like it and don’t realise that it is the result of a skilled designer. At this stage we want you to start noticing the design elements in the world around you. Next lesson we will start to examine the use of DE + P in the work of other makers. We love these reference posters from Paper Leaf because they show the DE + P in simple graphic form.
This lesson is all about creating your own reference sheets by looking closely at the world around you.
It doesn’t matter if you have just started your journey as a maker - slowing down and studying the fundamentals keeps it real. We challenge you not to skip ahead if you think you already know this stuff.
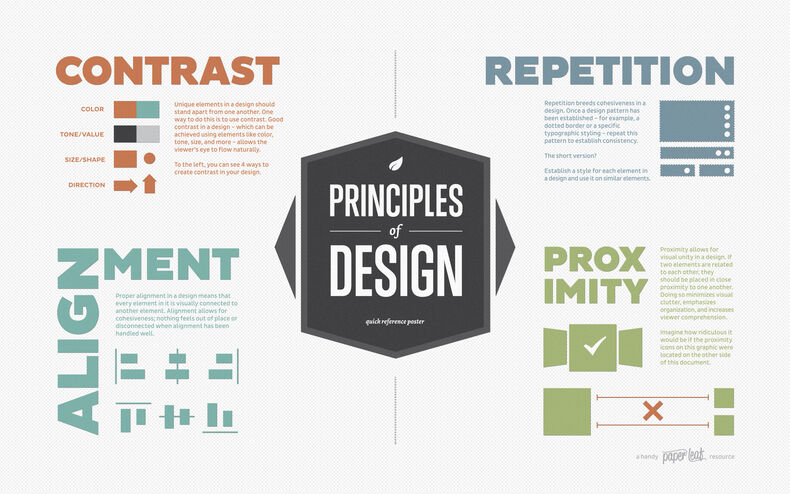
Paper Leaf's reference sheet
Let's do something!
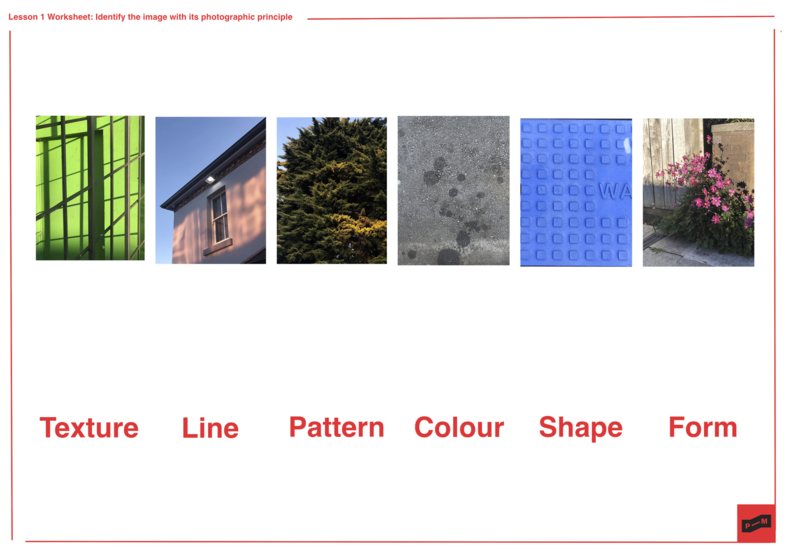
Anjuli's reference sheet - match the word with the image
Anjuli's Reference Sheet
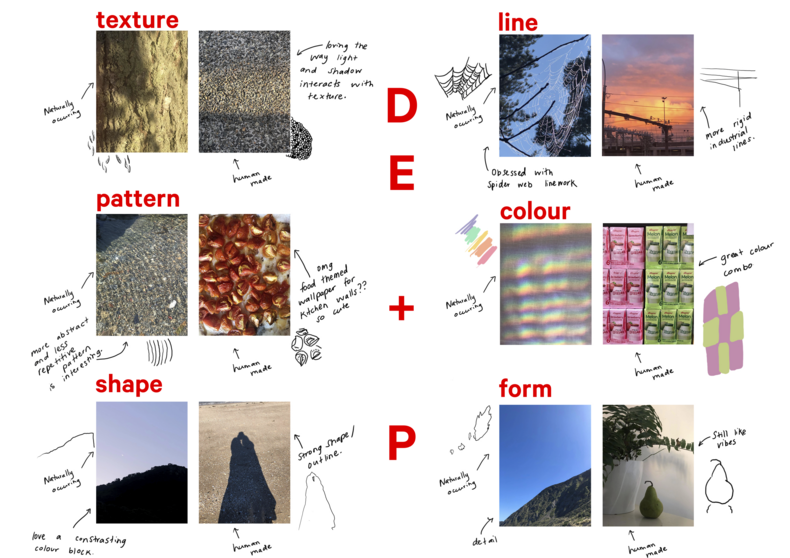
DE + P
Intro to InDesign
We love Daniel Scott. This is a long tutorial but you'll get what you need if you're new to (or fearful of) Adobe InDesign.