Digital Handmade Print Project

10 lessons

Figuring out your digital workflow

At this point you should have a collection of digital assets and some idea of how you want your final print to look. Knowing which software and tools to use and the most efficient ways to use them can be daunting. This is the time to figure out which tools will work for you.

Lesson menu

Equipment

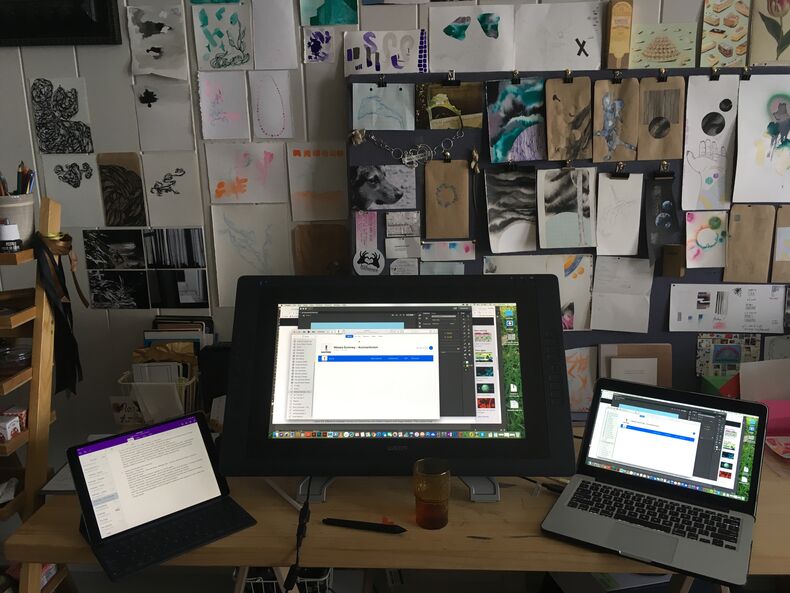
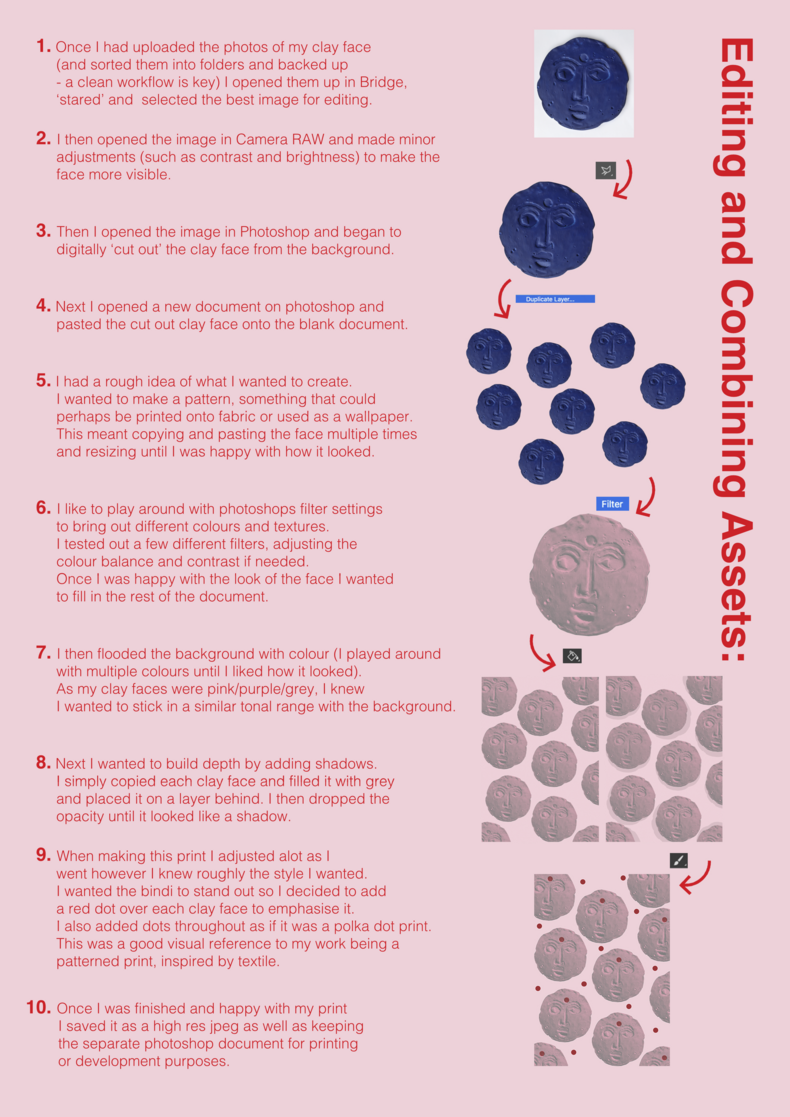
This depends on the nature of your assets and what you have access to.

In general you will need:

  • Device with a decent display and access to the internet
  • Portable storage or cloud based storage


Software from Adobe Creative Suite:

  • InDesign (for laying out final print)
  • Illustrator (for working with vectors/typography/illustration)
  • Photoshop (for image editing and working with pixels/digital painting)


There are free alternatives for these softwares which include:

  • Scribus (alternative for InDesign)
  • Inkscape (alternative for Illustrator)
  • Gimp (alternative for Photoshop)

Guiding Questions

Think about these questions as you work your way through the lesson:

  • What are the nature of my assets and which are the most sensible tools to use to put them together?
  • Which tools/software do I have access to?
  • Do I need to upskill before I start?
  • Should I consider getting Adobe Creative Cloud?
  • Where do I sit on the whole 'evil Adobe sucking the life blood out of the industry' thing?

Lesson Content

  1. Despite what you may have been told there isn't always one 'way' to do something. At this stage of the process we encourage you to spend the time learning some tools before starting to 'build' your print. This includes weighing into the lively debate around software and the whole ‘Adobe vs the free world’ argument. We have added a few links at the bottom of this lesson that you might find interesting. 

    Our stance is simple: it has to work for you. No matter what you pick or have, it’s about making it work for you.

    There is a tendency to death-spiral at this stage if you don’t have a lot of digital experience. We want to reassure you that even the most experienced designers feel this. The way to combat this feeling is to remind yourself that dedicating a day (or a few hours) to find and watch tutorials is NOT a waste of time. Although we do suggest watching at double playback speed so you can ascertain if the content is what you’re after.

    Lesson Content

    Demelza's multi-screen nightmare

Let's do something!

  1. 1

    Watch the videos

    Seriously - even if to confirm that you don’t want to use/do certain things.

    • Note down any key points/do the tutorials alongside the videos
    • Note down things you may need to find more tutorials on
  2. 2

    Find and do some more tutorials

    Now is the time to upskill - spend some time finding tutorials on YouTube. How can the shortest instruction take the longest time you ask?

    Easy.

  3. 3

    Write a quick workflow

    We know this seems unnecessary, but, sometimes writing a basic list or ‘order of operation’ can make something that seems complicated far easier to attack. 

    • List your assets and what you need to do to them 
    • Note the tools/software you need to modify the assets 
    • Add how long you think that will take
    • Re-write the list in a systematic order (like a recipe) 


    Your workflow could look something like this:

    Asset: Photographs of plants

    Alterations: Change opacity so I can trace over them (Ps), trace over them (Ai), colour them (Ai), add them to main print (Id)

    Order: 

    Open in Ps, save as ‘planttrace01’ in Google Drive>digitalhandmadeproject>edited assets, crop if necessary

    • Open in Ai, save as ‘plantdrawing01’ in same folder, create new layer and use pen tool to trace image, re-colour
    • Open Id, set up page for print (A2 CMYK with margins) and save as ‘testprint01’ in Google Drive>digitalhandmadeproject>test print, place objects and arrange, change scale/colour/opacity as required
    • Print a scaled version (A3) to check layouts and overall composition 

    NOTE: Id = InDesign, Ps = Photoshop, Ai = Illustrator

  4. 4

    Check out Anjuli’s exemplar

    Worth checking to see if it's helpful right? Oh and - you realised the videos are at the bottom of the page yeah?

Anjuli's workflow

  1. Anjuli's workflow

Vector vs Raster Graphics

Intro to Photoshop

What can we say? Daniel Scott is the MANTIS. What a great tutor.

Illustrator Updates with Daniel Scott

Adam Draplin in Illustrator

WARNING: Draplin does a wee bit of swearing ...

Intro to InDesign with Daniel Scott

This course takes the fear out of InDesign - granted we aren't doing a brochure but much of it is still applicable. Trying working alongside with your own asset. 

Tips & tricks

  • Know your file types - it’s really important to have an understanding of what files types mean and which software's they are compatible with. Go take another look at the resources from the last lesson if you have forgotten
  • Trailing a new software/doing a refresher course is never a waste of time - even if sometimes it feels like it might be

Next lesson

10

Finishing Up