As required by your selected processes along with:
- Paper or a computer to write a plan
- Tests and final idea
- Tutorials that you have seen that you might want to re-watch
It’s time to commit! You should have an idea/s that come from research, creative play and testing. Now it’s time to MAKE your handmade assets. The one thing to remember; things always take longer than expected. It’s a good idea to have a back up plan (a slightly less ambitious version of your idea) ready in case you do run out of time.
Equipment
As required by your selected processes along with:
Guiding Questions
Think about these questions as you work your way through the lesson:
Instructions
We have suggested 10 ‘classroom’ lessons to get your assets made. If you are following the suggested time create a table with 2 columns and 11 rows to help map out what you’re making, when you’ll make it and any adjustments to your plan.
The plan should also contain a list of resources so you have everything you need BEFORE you start.
Even if you are following your own schedule or don’t have time restrictions, planning your making is still an important skill. There is a link to Trello at the bottom of the page - if you haven't used it before give it a crack.
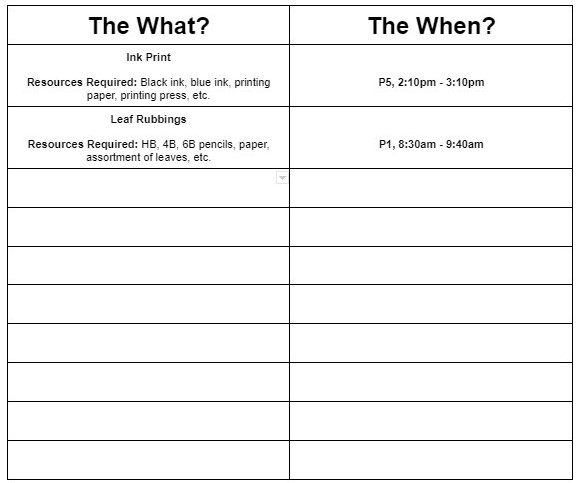
Rough time plan example
Your handmade assets do not need to be large as they are going to be either scanned or photographed at a high resolution.
Try and make everything small enough that making them doesn’t take too long - but big enough that it doesn’t become ‘fiddly’ to make them. Whatever scale you go with (we suggest A5/A4) try and keep it consistent.
If you are making assets that are being photographed together, like a staged still life they MUST be the same scale.
Otherwise your photo will not look how you planned.
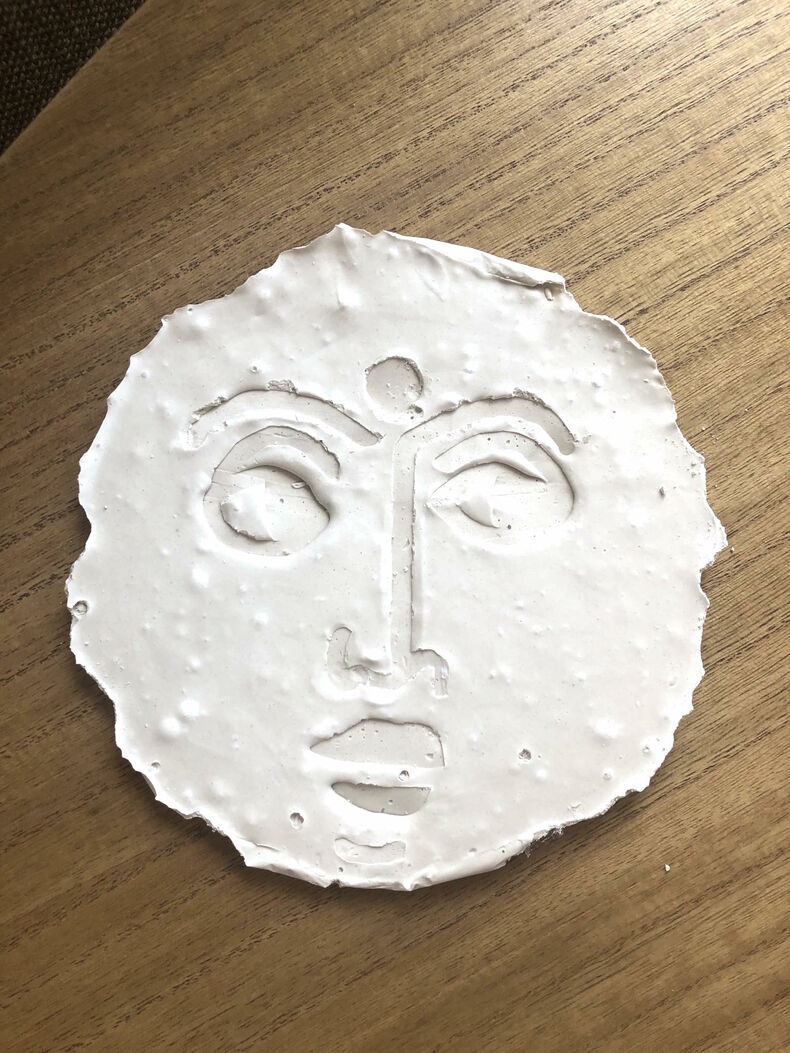
Anjuli's first cast asset
Try and hold yourself accountable to your planner.
You need to set yourself a very clear END date. Without a structured sense of pace this part of the project will go on forever.
Remember, this is only the first step in the making process ... and it is easy to go down a bit of a rabbit hole here.

Anjuli's second cast asset
Resources